The right build plate
1. Print bed size
Up to a certain size, everything that improve your printing bed adhesion, detachment and heat transfer is readily available.
Print bed thickness
Decisive for the flatness is, inter alia, the thickness of the plate. Thicker panels are offered with lower tolerances. You have to choose a reasonable middle ground somewhere due to the dead weight and the wear and tear of the rollers, due to additional stress.
I compared the thicknesses and tolerances between i could choose for my print bed with the additional weight and was satisfied with a 10 mm x 500 mm x 500 mm milled Aluplan AlMg4.5Mn plate from metall-fachandel.de, they also gave me good advice. The flatness deviation of 0.20 - 0.50 mm and thickness tolerance of + - 0.13 (mm maybe) result in a total deviation of up to 0.76 mm, which roughly corresponds to the deviations I noticed when leveling the printer.
The usable size is of course also limited by brackets and the like, something that can be avoided. With smaller plates you can use thinner ones, also to reduce the load on the rollers, but a certain thickness can also enable another mounting option.
Assembly
It should be a perfectly flat plane without holes or brackets. Hence, I drilled threads into the bottom. If you have difficulties with the exact marking, simply use your laser cutter. The heads of the screws must also be sanded or sawed.
A couple of silicone dampers replace the springs so that less play ensures a more stable height. I made mine by myself, with a self-printed form. You can quickly find something useful like this: www.thingiverse.com/thing:4771005
I used heat resistant silicone and 16mm in height.
2. Print bed material
Aluminum or steel with or without a cover pad. You have the choice.
Milling the plate makes it relaxed. Milled plates are therefore less distorted. While rolled or cast plates lead to larger deviations more easily when the temperature changes.
The hardness of my plate of only 70 HB corresponds to the hardness of polymethyl. (Plexiglas) and little less the hardness of copper (75HB), there is still much softer aluminum. A hardness of 160 HB roughly corresponds to the average hardness of chrome-nickel steel, which would be significantly more scratch-resistant, which is why I was initially interested in the high-strength aluminum plate.
3. Print bed surface
As an alternative to the smooth plate, I saw one on YouTube with a rough structure, on which the print held very well, without additional additives. But what happens with frequent use, if something sticks and you have to scrape it off or not hold it tight enough and you fix it with hairspray and then have to scrape it off?
The smooth print bed is a conventional solution, you can get everything back down with a smooth spatula. The print bed get scratches but for me they are tolerable.
However, if you cut deep notches into soft aluminum a little easier, you might want to test a high-strength plate. It's not milled, but I'm curious to see what deviations will have to be set when leveling. I would have tried if no other had been recommended to me.
4. Print bed pads
Permanent printing plates are now also available for 500 mm x 500 mm, but these in turn have to be glued or clamped and cannot be removed magnetically. In addition, the heat transport deteriorates with each additional plate. I already dealt with the problem of heat transport when I was creating my own marlin.
Smaller magnetic permanent pressure plates, on the other hand, allow very easy removal. If you have an aluminum plate, there will no magnet keep in place on it. However, there are permanent printing plate sets that come with an adhesive magnetic counterpart.
You can always apply a permanent printing pad if the aluminum plate is too used up at some point.Why I wouldn't buy a new one is because it would be too much of a hassle to detach my heating board, drill new threads and put the heating board back on.
I exclude removable printig pads for myself. First, higher bed temperatures are unsuitable for some. Second, if something falls under the removable plate, will it be incorrectly leveled. Thirdly, if the plate is incorrectly positioned, it is also poorly leveled. It creates additional problems that can be avoided.
5. Adhesion and durability
Until now everything stuck to my smooth aluminum plate with hairspray. So far I have had no problem removing it. Of course the hairspray has to be removed again, sometimes I clean the bed, it is not necessary that often.
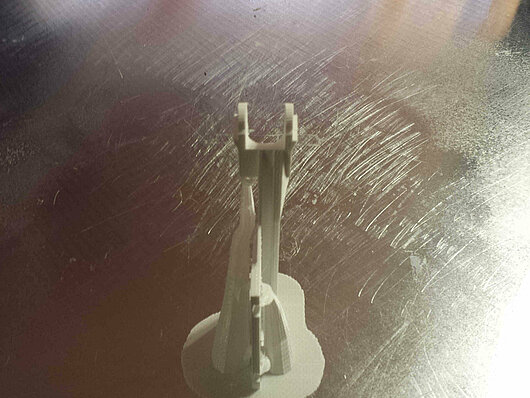
As you can see in the photo, I've been scraping on it with my spatula. Visually it is a shame compared to the pretty bare sight of a new plate, but it does not affect the print, at least not until now.
I am sure that this aluminum plate will last a very long time. In contrast to the previous glass plate, which cracked at very high heat, i.e. at a surface temperature of around 120 degrees, for which the heating bed had to be heated to 170 degrees. Now I no longer need a correction factor to reach the set heat. To measure the temperature with the infrared thermometer, however, you have to put something matt on the bare metal.
Comments
No Comments

