
CR-10-S5 from Marlin to Klipper
A long overdue change
Marlin may have been further developed, but the old hardware only works reasonably well with an older version.
However, because I kept experiencing repeated errors and starting a print job was always problematic, switching to a newer version helped me a lot.
Now I can even start a print job unattended with Klipper and usually get good print results.
Hardware changes
| Component | Before | After |
| motherboard | Creality v2.2 | Manta M8P v2.0 + CB1 |
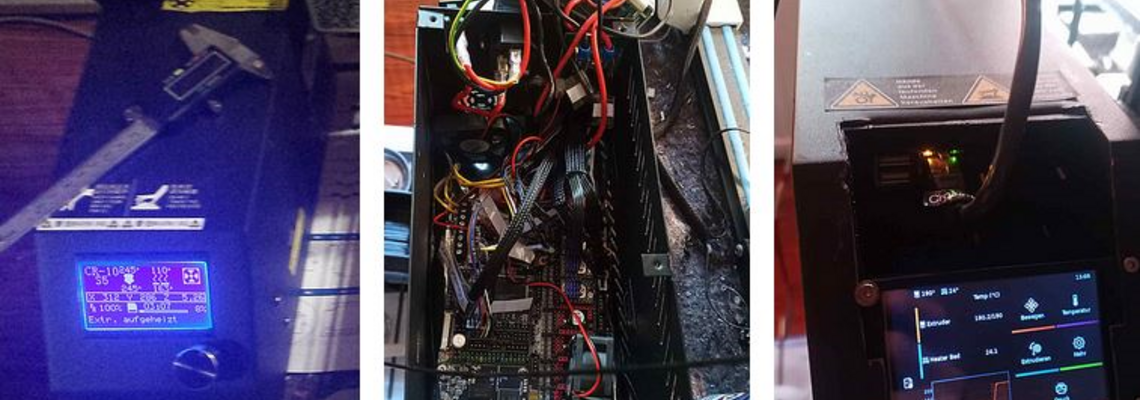
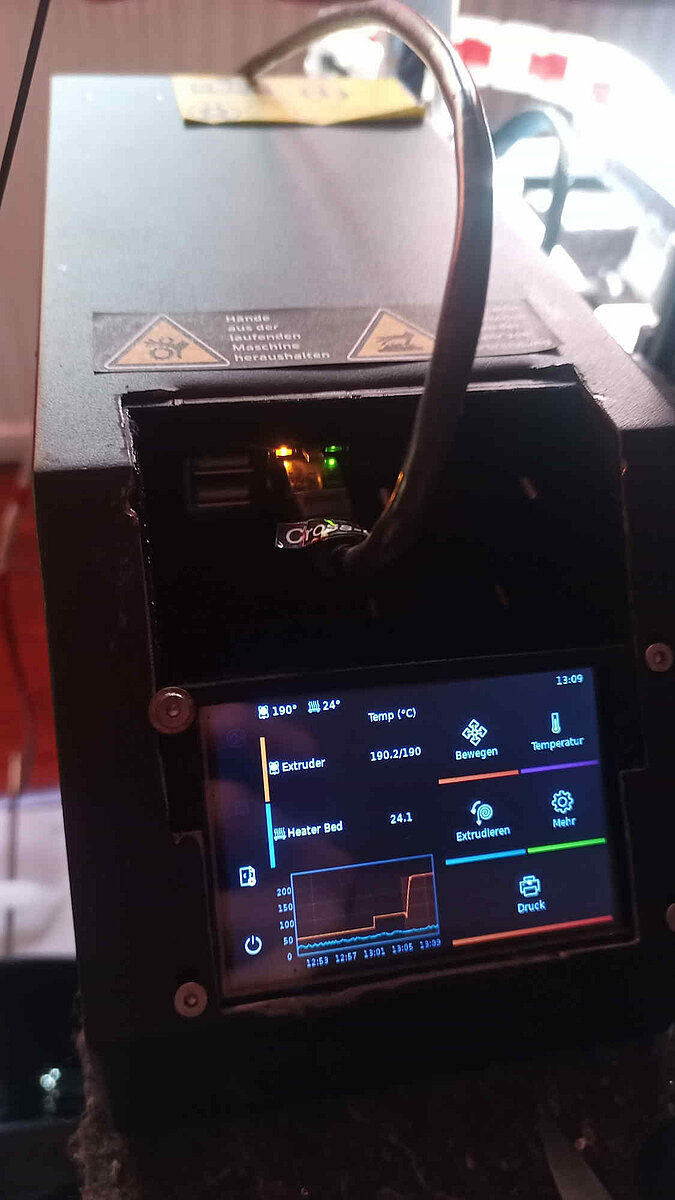
| display | Single color with rotary knob | TFT 35 v2.1.1 a RGB LCD Touch (resistive) |
| case | Unchanged | Flexed or multi-mastered :D |
| axis Z | Connected with belt (one motor driver) | Two motor drivers and height compensation function (tilt correction with BL-Touch) |
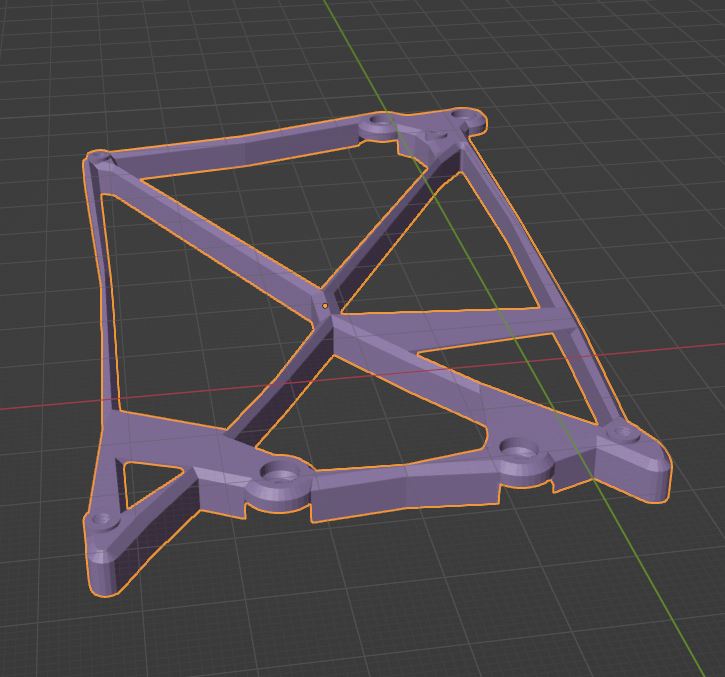
The new components, of course, fit perfectly on the existing mounts after I printed and adjusted adapters.
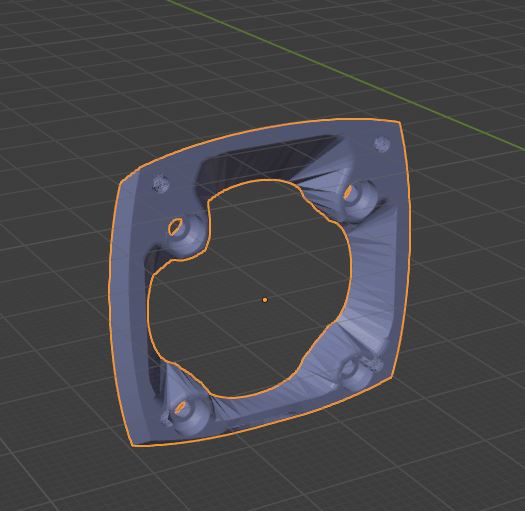
I also changed the position of the two fans because there wasn't enough space for the larger one at the front.
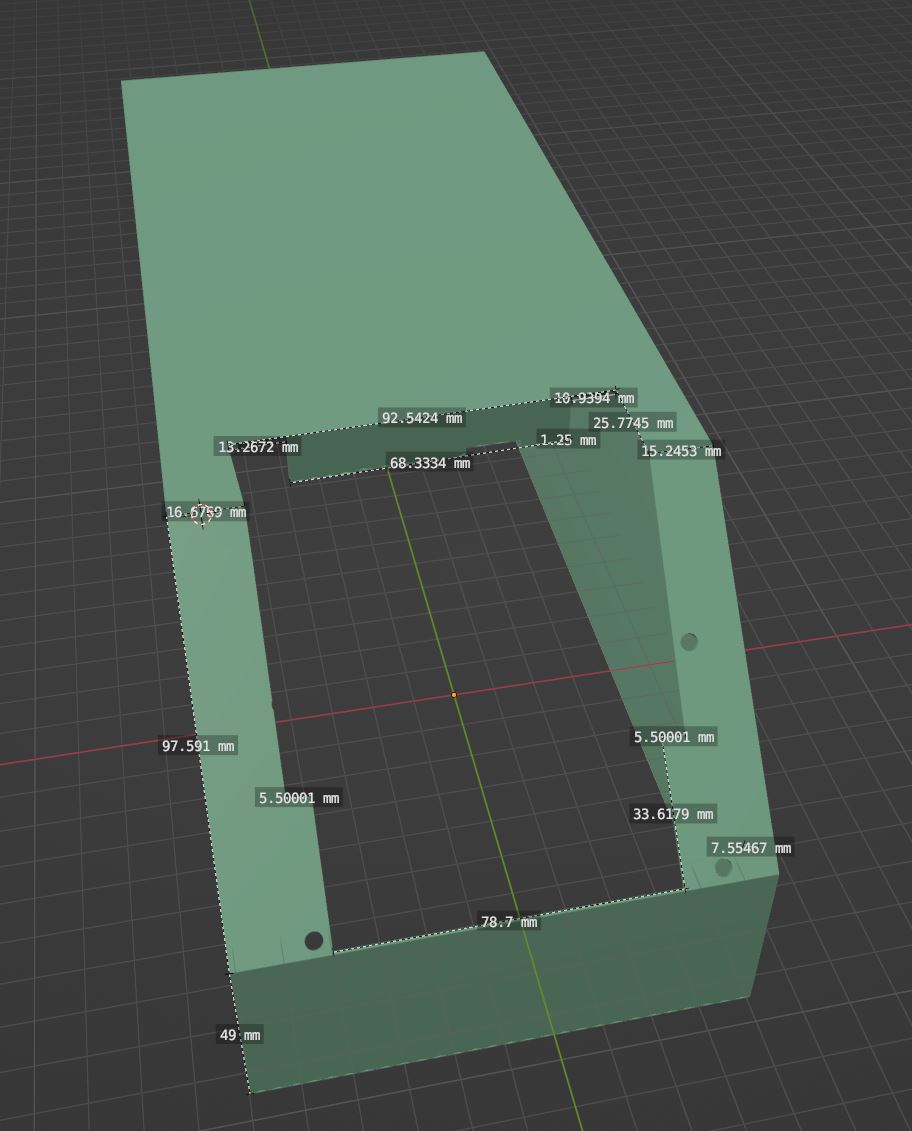
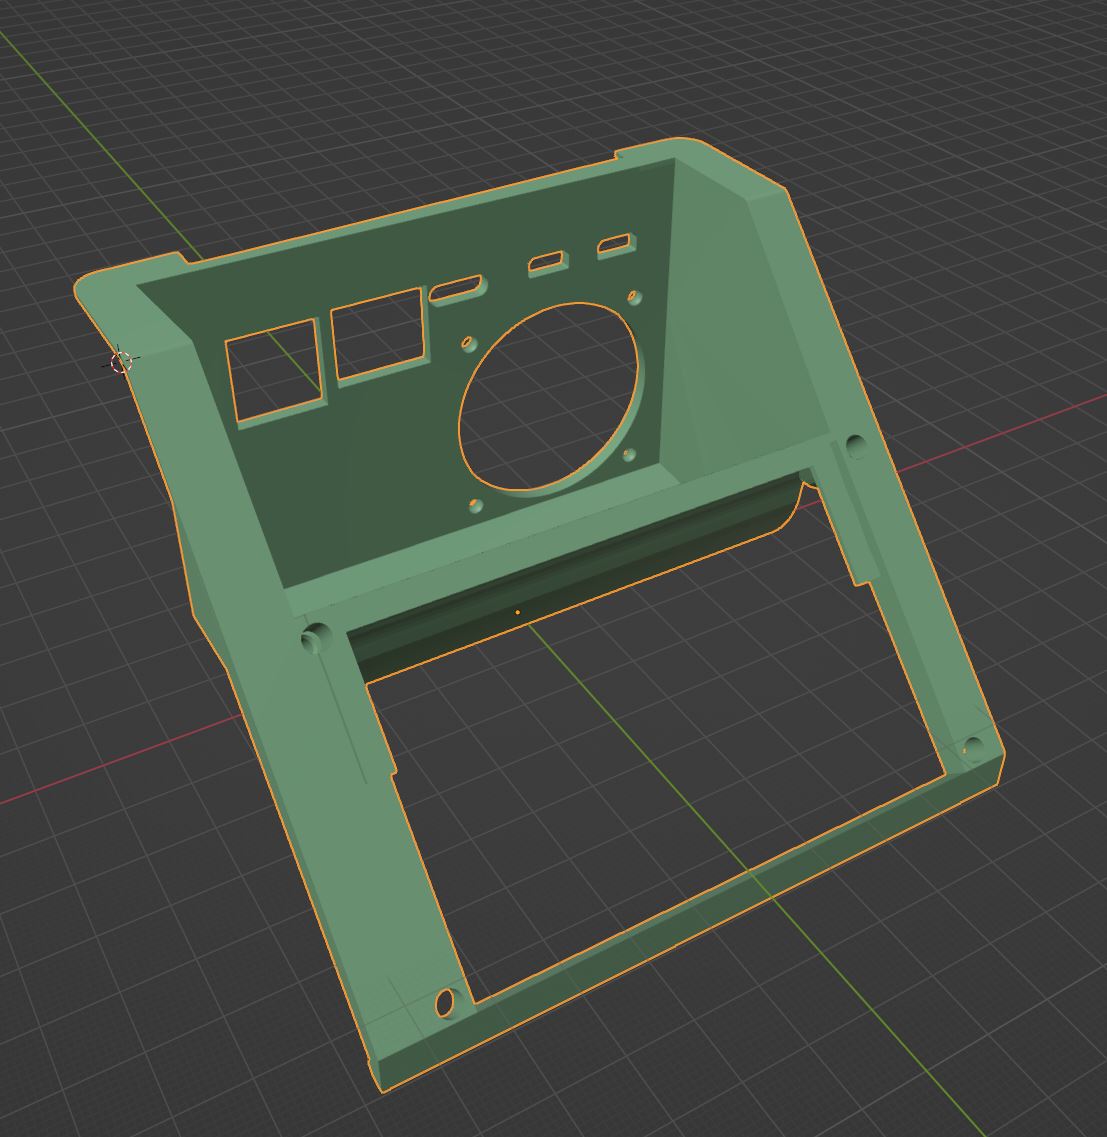
Mounting adapter
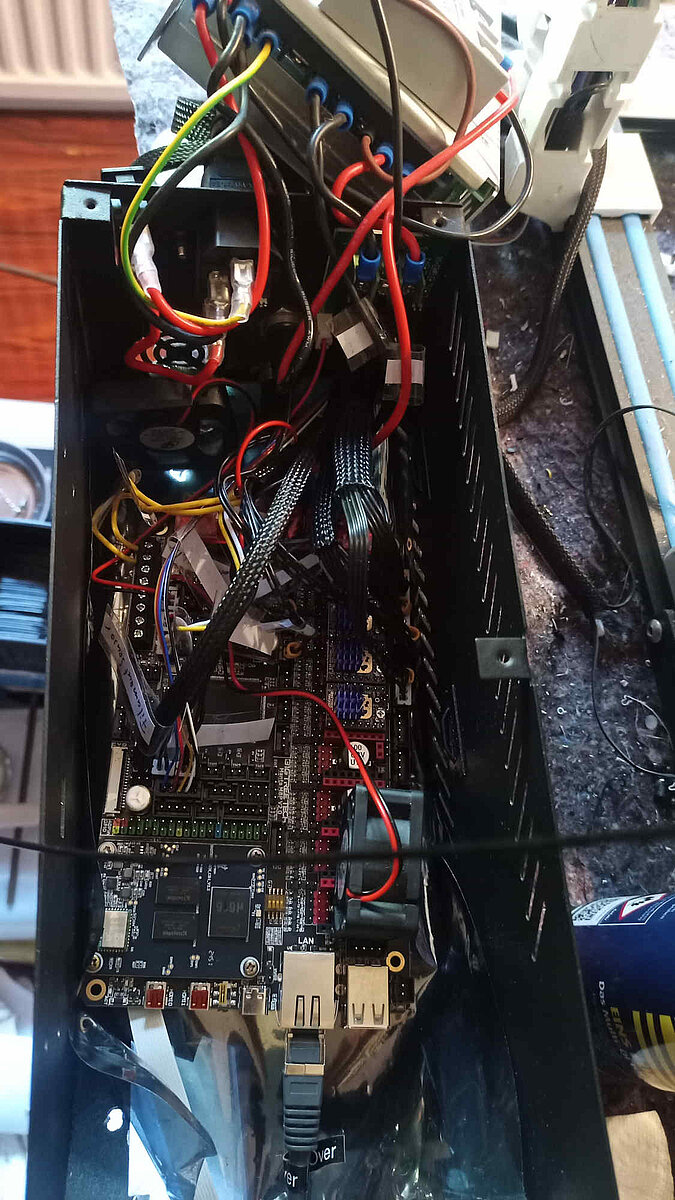
First, I removed everything from the case and labeled each cable with little notes to avoid confusion later.
Then I measured everything as best I could, printed a template for cutting and drilling, and glued it on. Once everything was perfectly cut out (although it was a little crooked), I made a few adjustments to the monitor and fan adapter.
Before, afterwards
Helpful for the conversion
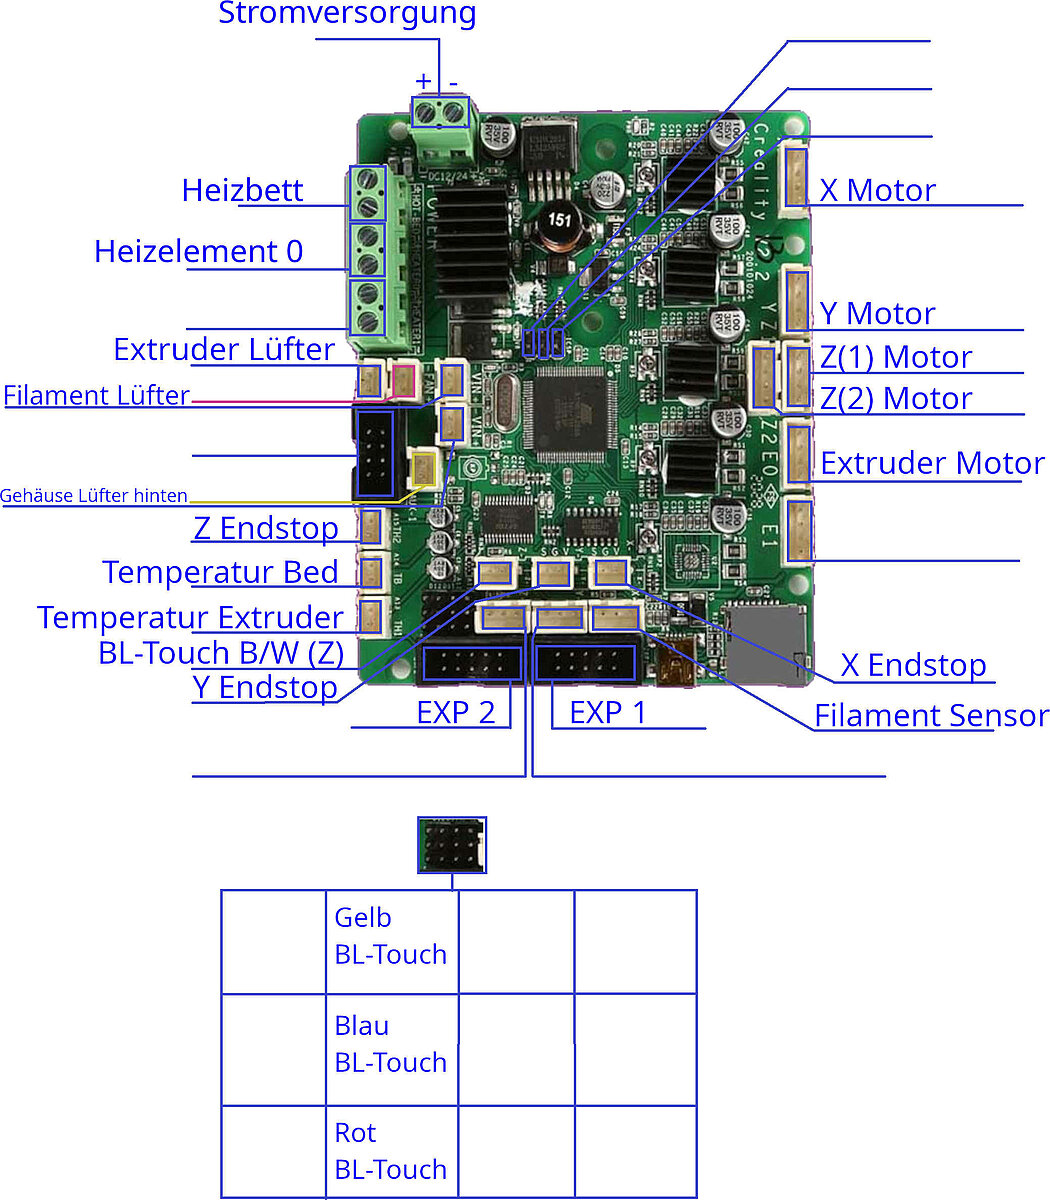
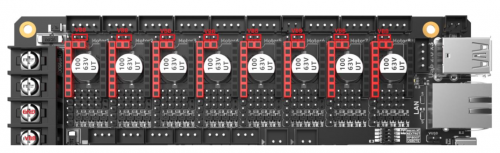
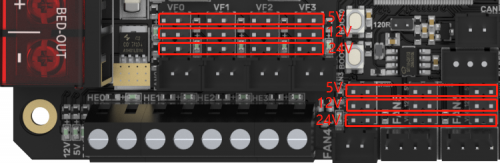
Connection diagrams eliminate the need to trace every cable to figure out what's connected to it.
They're even more important for crimping the connectors correctly. For example, if the endstops have only two pins but the sockets have three, in this case, they're pins 1 and 2, or PFX and G, while pin 3 remains free.
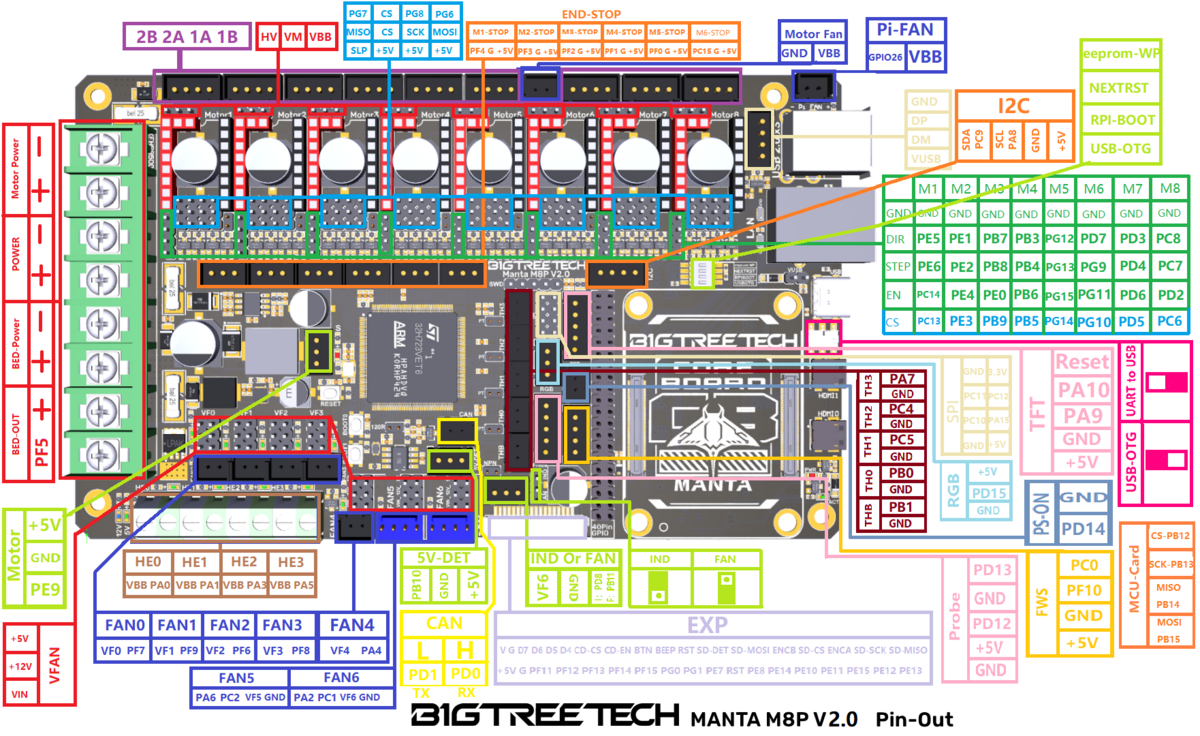
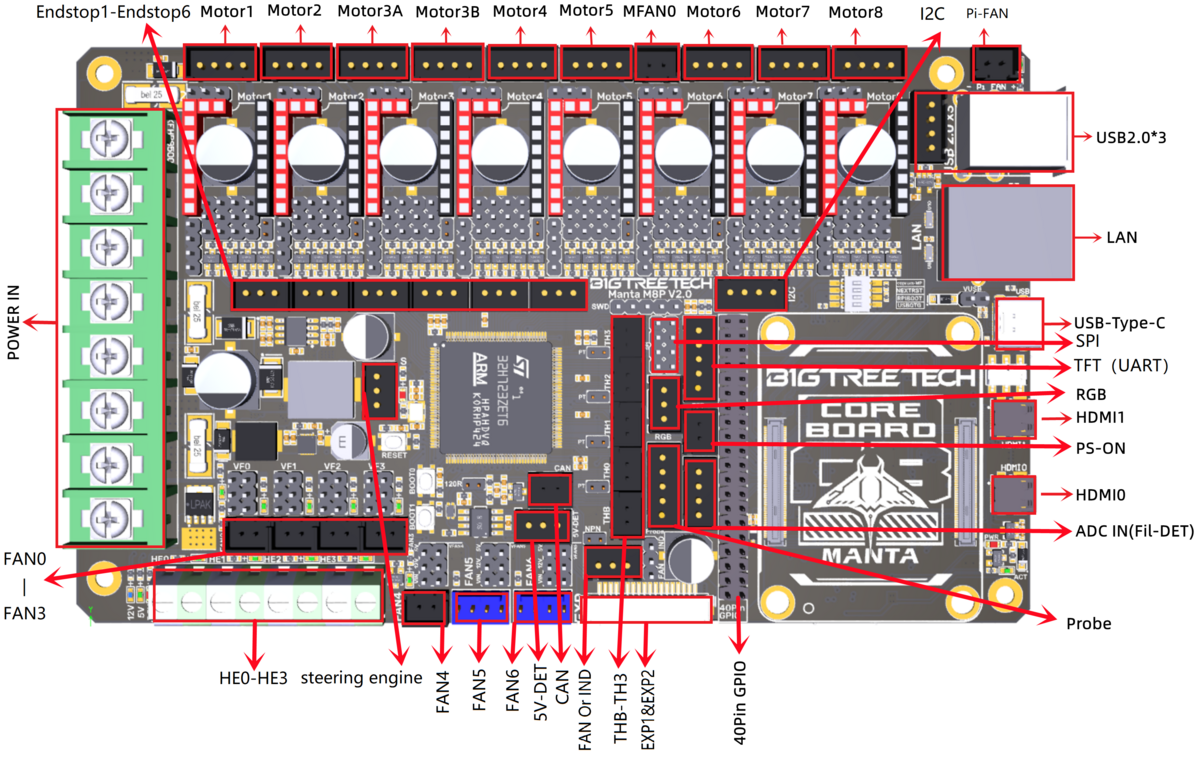
The BIGTREETECH MANTA M8P V2.0 User Manual.pdf is also required, and the CB1 manual may also be helpful.
Be sure to consult the jumper assignment section in the manual before installing the stepper motor drivers.
In my case, I used TMC2209s, which operate in UART mode, and the correct jumpers must be set for this.
The following table for the BL-Touch helped me:
| plan | Pin | Assumption 1 | Assumption 2 |
| White | PD13 | Black | Red |
| Gray | GND | White | Blue |
| Yellow | PD12 | Yellow | Yellow |
| Red | +5V | Red | Black |
| Brown | GND | Blue | White |
I think assumption 2 was correct in my case. I didn't have any precise information about my BL-Touch, and the cables were different colors than those listed in the manual.
Software Installation
Once the hardware is prepared, the software can be set up.
- Download the desired image. Here: CB1_Debian12_Klipper_kernel6.6_20241219.img.xz from https://github.com/bigtreetech/CB1/releases
- Copy to a micro SD card. I used Rufus (5 MB in size, why do other programs over 100 MB use this?!!)
- The Micro SD card goes into the SOC slot! (System on the card – slot, SotC ;-)
- Start and connect using MobaXterm, read the IP from DHCP or find it by
ping bigtreetech-cb1 -4
After that, all the instructions were confusing because of a lot of commands and instructions that either didn't work or were simply incorrect.
Amendment 19.11.2025
After discovering a bug that caused the CB1 clock frequency to deviate by one megahertz, I spent some time writing with an AI and changed my firmware to a "Linux process". This only required me to change the permissions for the Klipper-MCU service. Although it was listed as "enabled"—meaning it showed loaded, enabled, and present, as well as a process ID and CPU time—the lines for "Tasks", "Memory", and "CGroup" were missing.
To use "Linux process" firmware, it must be compiled accordingly; this should hopefully avoid the clock frequency error. It was flashed using "make flash," and "klipper-mcu" required the following permissions:
echo "kernel.sched_rt_runtime_us = -1" | sudo tee /etc/sysctl.d/10-disable-rt-group-limit.conf
sudo sysctl -p /etc/sysctl.d/10-disable-rt-group-limit.conf
sudo systemctl restart klipper-mcu
sudo systemctl status klipper-mcu
Klipper Firmware
- Connect to the found IP and MobaXterm (or Putty, whatever).
- User biqu
- Password biqu
The status could already be viewed via the web interface and the same IP.
I wanted to proceed according to the manual, but there were no directories in which any ID should be found
- In DFU mode you should be able to find the manufacturer and product ID (here: 0483:df11) with the lsusb command
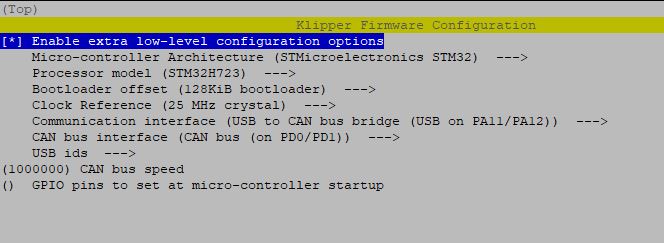
- Also according to the manual you can prepare Klipper for the board via make menuconfig
- and then without downloading it simply install it in DFU mode using biqu@BTT-CB1:~/klipper$ make flash FLASH_DEVICE=0483:df11
- canbus settings still had to be transferred, with the following command you get the uuid:
~/klippy-env/bin/python ~/klipper/scripts/canbus_query.py can0
canbus_uuid=68cd148832f3
The ID (which is different for each printer) must then be entered in the printer configuration file. To do this, I entered the template from github.com/bigtreetech/Manta-M8P/blob/master/V2.0/Firmware/generic-bigtreetech-manta-m8p-V2_0.cfg in the
printer.cfg file under "Machine" in the Moonraker web interface, which I had previously uploaded there. (See category [mcu])The web interface can be accessed with the same IP.
What needs to be set there can be found in the reference: https://www.klipper3d.org/Installation.html
You should take some time for this. Especially for adjusting the direction and the status of the end stops, it's best to choose a very small heated bed to protect the motors and belts.
printer.cfg3 KB
My printer.cfg file as an example, contains heatbed data that is only suitable for my heatbed!
generic-bigtreetech-manta-m8p-V2_0.cfg9 KB
My generic-bigtreetech-manta-m8p-V2_0.cfg file as an example, maybe I should have renamed it to MY-CR-10-S5-bigtreetech-manta-m8p-V2_0.cfg, because it is only suitable for my printer!
Calibrate or Frying Kali
When everything was finally running, I ran PID_CALIBRATE for the heatbed and the material heater via the console.
PID_CALIBRATE HEATER=extruder TARGET=220 WRITE_FILE=1
pid_Kp=27.033 pid_Ki=1.733 pid_Kd=105.429
PID_CALIBRATE HEATER=heater_bed TARGET=100 WRITE_FILE=1
pid_Kp=68.623 pid_Ki=1.688 pid_Kd=697.379
The values must be saved or transferred.
Then I set the Z offset of the BL-Touch, the entry should be missing when you execute the command
PROBE_CALIBRATE
bltouch: z_offset: 1.767
However, I changed the value a little later.
Superslicer
Using the Superslicer program, I performed various test prints, which can be selected in the program itself (under Calibration) and are sufficiently explained.
However, I still had one issue: the first 5 to 10 mm of the print were printed too narrowly. This was a bug I couldn't find anywhere; resetting or reloading the settings in Superslicer solved the problem.
A lot of settings had to be made in the Superslicer before we could finally print properly, so you have to take some time for that.
My Custom G-Code (Filament Start):
M190 S{(first_layer_bed_temperature[current_extruder] * 0.90)} ; Wait until Bed Temp 90 %
M140 S{first_layer_bed_temperature[current_extruder]} ; set 100 % Bed Temp without waiting
M109 S{(first_layer_temperature[current_extruder]*0.80)}
BED_MESH_CALIBRATE
M109 S{(first_layer_temperature[current_extruder]*0.95)}
G1 E-2.5 F500 ; manuel retract (2.5 mm)
M104 S{first_layer_temperature[current_extruder]}
M190 S{(first_layer_bed_temperature[current_extruder])} ; Wait until Bed Temp 100 %
G1 E10.0 F500 ; manuel unretract (10.0 mm)
My custom G-Code (Print Start):
G28 ;Home
Z_TILT_ADJUST ; Z-Tilt
G28 Z ; new home axis Z
BED_MESH_PROFILE LOAD=default_9_9_110 ; load Mesh-Profil (optional)
G92 E0 ; Reset Extruder
G1 Z2.0 F50 ; Move Z Axis up
My custom G-code (end print):
G91 ; Relative Positioning
G1 E-5 F500 ; 2 mm retract
G1 Z0.2 F50 ; Z +0.2 mm
G1 X5 Y5 F500 ; move to side out
G1 Z10 ; Z +10 mm
G90 ; Absolute Positioning
G1 X0 Y{print_bed_max[1]} ; move to Y max
M106 S0 ; Fans off
M104 S0 ; Heater off
M140 S0 ; Bed off
On November 20, 2025, I fixed an issue here. The Z-axis travel speed was too high; it executed the command but didn't reach the required height, causing the nozzle to scrape the bed. If you're wondering why the height is incorrect despite all measurements, you may need to reduce the travel speed.
Conclusion
The effort is much greater than you initially think.
The result, however, is quite encouraging.
- The color screen is much more appealing
- The print starts more reliably and adheres better because calibration is easier
- The software prints more reliably; very complex models could not be printed with the Marlin before
- The network connection enables better surveillance, the only thing missing is a camera, which you can supposedly connect – could – if you wanted to
Instead of walking to the printer with the SD card once to start printing, I now walk there once to turn it on, then back to upload the file and start printing, and then walk there a second time to check that the print has started. Everything is constantly being improved so dramatically; the developers even consider my movements—fantastic.

Comments
No Comments